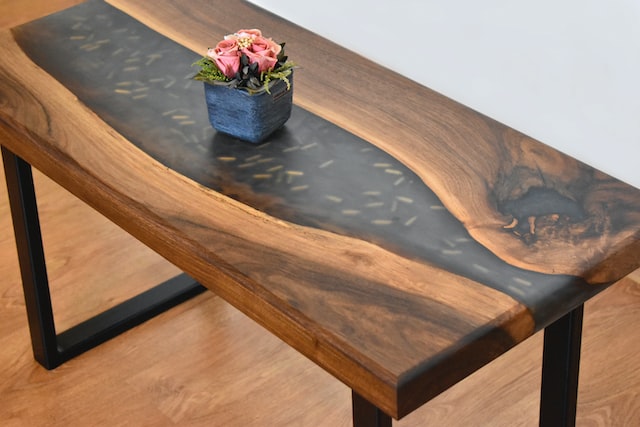
You can create an epoxy river table with epoxy resin nestled in between wooden planks. There are so many variations you can try with this but the principles are the same. This is also a popular epoxy craft that many people recognise. You can add lighting to the table to create something very unique and a conventional table can be transformed into a piece of functional art.
The contrast between the wood and the striking blues and green of the resin is what draws the eye to this table. The sky is the limit when it comes to creating your own epoxy table and you can use any colour you like with varying levels of opaqueness. Deep pour epoxy resin is required for the project. This has a low viscosity compared to what is conventionally used to make jewellery and other coatings. The thin consistency of the resin makes it very easy to pour into the mould. Make sure that you add a transparent layer over the table once the creation is done. By sealing the epoxy, you are increasing its durability. Make sure that you have a place to work that is free of dust and well ventilated. A warm area is an ideal place to work as cold and humid conditions can affect the appearance of the resin.

First you need to prepare the wood by cutting the right length. A carpenter can help you with this as they will have the right equipment to do the job. You can also saw the wood to size in a DIY store. If the wood has a natural edge, it can add more beauty to the final piece. However, you need to have seasoned wood for this. The bark of the wood has to be removed and the entirety of the wood has to be sanded. The wood can then be sealed with crystal clear epoxy resin in areas that are uneven. Using some tape on the edges will prevent the resin from running of the edges. You will then need to create a mould from MDF boards so that you can cast the epoxy resin. Have the side panels be 1cm higher than the tabletop. Make sure that a release agent, silicone spray or liquid release wax is applied to the mould.

The wood can be inserted once the mould is done and you need to clamp them in the way you want the final appearance to be. It is good to have a silicone barrier along the edge of the river for a clean resin pour. This way, the resin forming the river will not spread across the table. Once you have your protective wear, you can start mixing the resin according to the ratio specified by the manufacturer. The air bubbles can be removed with a heat gun or a hair dryer on low. You can mix resin with different colours in separate containers. You can pour these coloured resins at the same time or alternatively. Move the container in circular motions to give a water effect. You can also use a wooden stick to further create ripples. After the resin has cured, the mould has to be removed so you can sand the table top by hand or by using an orbital grinder. Polish the epoxy resin and then use a finish on top to seal it.


